The Versatility of Light Walls in Studio Set Design
- Dana Story

- Jul 21, 2021
- 2 min read
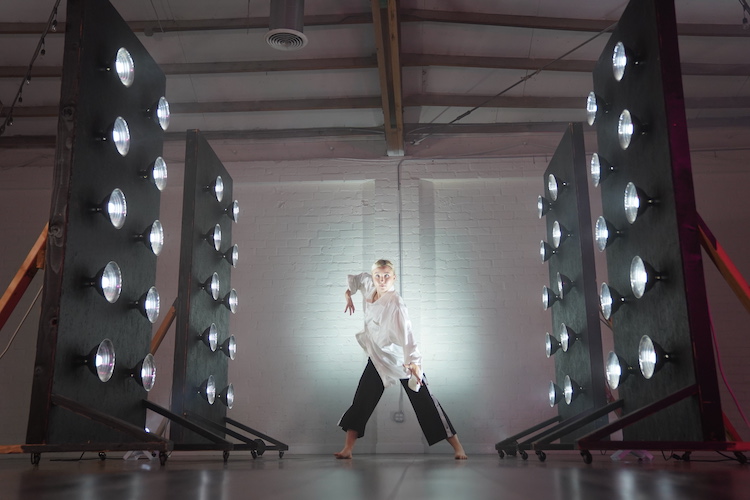
What started as a simple backdrop for dance videos has now become a prop with endless possibilities. These light walls have found their way into stage shows, fashion shows, music videos, fashion shoots, and even as dividers in the room. Their versatility has amazed us, and we want to share with you how they were built, how you can create your own and some ideas for how you can incorporate them into your next project.
Interested in booking our studio with light walls? Fill out our booking form to inquire about availability and options

Step 1: Building the Set Flats
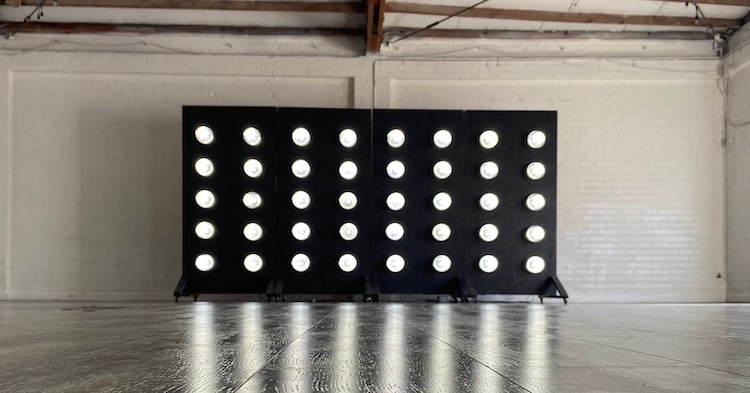
To begin, construct the set flats as the foundation for the light walls. You can find detailed tutorials on building set flats online. When it comes to the front panel of the wall, carefully plan where you want the lights to be placed.
To achieve our desired lighting effect, we spaced the lights evenly with 10 lights per 8-foot wall, arranged in two rows of five. Drill holes in the wall of just the right size to insert the light sockets. The holes should be large enough to accommodate the sockets but not too big, as we want them to remain securely in place.
To ensure stability and portability, we built a base for the walls with casters. Looking back, we admit that we may have overbuilt the bases, making the walls bulkier to store and configure into different shapes. Consider making the base smaller to enhance convenience.
Supplies Needed for Adding the Lights. We have created easy links to Amazon to view these products.


Step 2: Selecting the Lights
We experimented with various light types and ultimately settled on RGB LED lights for our walls. Initially, we tried warm white lights, but they consumed too much power and emitted excessive brightness. Ideally, the lights you choose should be dimmable since they are primarily meant for background and set design, rather than as direct lighting sources.
We discovered that having multi-color options greatly expanded the versatility of our light walls, enabling us to create different moods and atmospheres as needed.
Step 3: Adding the Lights to the Walls
Now it's time to connect the power strips, Work/Clamp lamps, and LED light bulbs to the walls. Ensure all connections are secure and that the lights are evenly distributed across the panels. Take care to hide any excess wiring to maintain a clean and professional appearance.
Take a look at the time lapse video showing of us adding the lights and connecting the walls.
Step 4: Embrace the Possibilities
With your light walls complete, it's time to unleash their full potential. These walls have proven themselves as exceptional backdrops for dance videos, stunning setups for fashion shows, captivating backdrops for photoshoots, and eye-catching decorations for various events. They have truly become a standout feature of our studio, elevating the creative possibilities for our productions.
Whether you're a photographer, videographer, or involved in any creative endeavor, incorporating light walls into your set design can bring a dynamic and captivating element to your work.
Interested in booking our studio with light walls? Fill out our booking form to inquire about availability and options


Comments